01
tabBar底部菜单
02
自定义tabBar
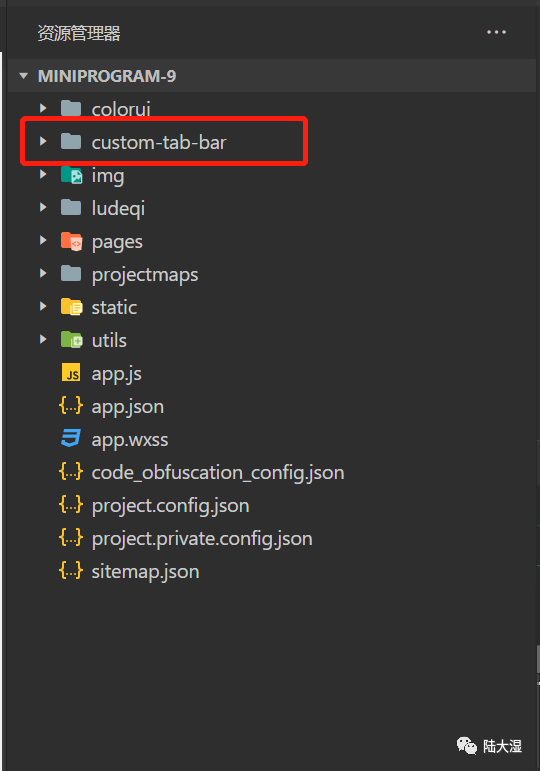
组件创建好后,开始编写具体实现功能代码
wxml
<view class="tab-bar" style="background-color: {{backgroundColor}};"><view class="tab-bar-border" style="background-color: {{topBorderColor}};"></view><view class="tab-bar-border"></view><view wx:for="{{list}}" wx:if="{{item.type!=4}}" wx:key="index" class="tab-bar-item"data-url="{{item.url}}" data-index="{{index}}" data-type="{{item.type}}" data-appid="{{item.appid}}" data-id="{{item.id}}" data-outimg = "{{item.outimg}}" bindtap="switchTab"><image src="{{selected === index ? item.sicon : item.icon}}"></image><view style="color: {{selected === index ? selectedColor : color}}">{{item.name}}</view></view></view>
js这边我是写了一个请求,getApp().gettabbar(‘tabbar’).then就是请求后台,赋值给list,这样就实现后台自定义tabbar自定义菜单
Component({data: {selectedColor: "#000000",backgroundColor: "#ffffff",color: "#8a8a8a",topBorderColor: "#393d49",},attached() {var that = this;getApp().gettabbar('tabbar').then(res=>{that.setData({list:res.data.data.list})});},methods: {switchTab(s) {const e = s.currentTarget.datasetconst app = getApp().globalData;const url = e.url;//console.log(e)switch(e.type){case 0:wx.switchTab({url})this.setData({selected: e.index})break;default:app.gourl(e,'tabbar')break;}},}})
wxss
.tab-bar {position: fixed;bottom: 0;left: 0;right: 0;height: 96rpx;background: white;display: flex;padding-bottom: env(safe-area-inset-bottom);}.tab-bar-border {background-color: rgba(250,250,250 0.33);position: absolute;left: 0;top: 0;width: 100%;height: 1px;transform: scaleY(0.5);}.tab-bar-item {flex: 1;text-align: center;display: flex;justify-content: center;align-items: center;flex-direction: column;}.tab-bar-item image {width: 27px;height: 27px;}.tab-bar-item view {font-size: 10px;}
json:
{"component": true}
2、组件设置完成后,在 app.json 中的 tabBar 项指定 custom 字段设置true

3、然后在需要中页面中引入tabbar,定义一个tabbar方法,在show中调用这个方法。这里的this.tabBar(0) 代表第一个页面,以此类推。0、1、2、3
js:
tabBar(index){if(typeof this.getTabBar === 'function' && this.getTabBar()){this.getTabBar().setData({selected:index})}},onShow: function () {this.tabBar(0)},
这边我的样式基本上没什么变化,所以在wxml中就没有引入组件。
还有一个在json中引入组件、在WXML中调用组件,
单页面引入组件json:
{"navigationStyle": "custom","usingComponents": {"cu-custom": "/colorui/components/cu-custom/cu-custom","tabbar":"/custom-tab-bar/index"}}
当然也可以在app.json中全局引用,这样所有的页面都能直接使用。
app.json:
"usingComponents": {"tabbar":"/custom-tab-bar/index"},
wxml:
<tabbar id="tabbar" active="0" ></tabbar>js:
onShow: function () {if (typeof this.getTabBar === 'function' &&this.getTabBar()) {this.getTabBar().setData({selected: null //标亮的导航按钮的下标,如果是其他子页面,可以赋值为null})}var tabbar = this.selectComponent("#tabbar")tabbar.run();},
03
最后说明


天天劈木板:

本篇文章来源于微信公众号: 侵客技术
© 版权声明
常见问题FAQ
- 免费下载或者VIP会员专享资源能否直接商用?
- 本站所有资源版权均属于原作者所有,这里所提供资源均只能用于参考学习用,请勿直接商用。若由于商用引起版权纠纷,一切责任均由使用者承担。更多说明请参考 VIP介绍。
- 提示下载完但解压或打开不了?
- 找不到素材资源介绍文章里的示例图片?
- 陆大湿源码解压密码


